0xchristmas: Difference between revisions
imported>Ardillo m →code |
imported>Ardillo mNo edit summary |
||
| Line 95: | Line 95: | ||
== What should it look like == | == What should it look like == | ||
For the christmastree look here: [https://tinkercad.com/things/klKeRoT7btV-project-0xchristmas-christmastree Tinkercad - project: 0xchristmastree]<br> | |||
Image of breadboard with LED,s and piezo connected. | Image of breadboard with LED,s and piezo connected. | ||
Revision as of 13:32, 28 November 2013
Summary
A special edition christmas arduino workshop. We'll be using a new very small arduino clone called ["Trinket"].
We can make a christmas star/tree with sound effects.
Ardillo did some research and collected a list of parts which can be bought for a fair price.
Who
research: Ardillo
Workshop: Fish_ && Ardillo
Christmas kit
The Trinket is one of the cheapest clone (unless you tinker around yourself).
We've made a DIY christmas kit which consists of the following:
Parts 0xchristmas
| amount | what | price | url |
|---|---|---|---|
| 1 | trinket 5V Logic | €8,00 | [floris.cc-trinket] |
| 1 | breadboard | €4,00 | [floris.cc-breadboard] |
| 1 | USB - mini USB cable | €2,08 | [Farnell-usb cable] |
| 1 | Piezo buzzer | €1,00 | [Farnell-piezo buzzer] |
| 1 | Light Dependant Resistor | €0,77 | [Farnell-LDR] |
| 2 | high power LED's | €0,60 | [Farnell-LED's] |
| ? | red/green LED's | €?? | Randomdata's own supply |
| ? | jumpers/cables/wire | €?? | Randomdata's own supply |
| 1 | splitted shipping costs | €0,56 | Farnell & Floris.cc shipping divided by amount of kits |
| Total | €17,01 | aproximitly €20 |
The url's of Farnell are without tax, our price is with 21% tax.
trinket HowTo
During the workshop we tell about arduino's and why they are awesome.
The Trinket is a little different but still easy to work with. It is important to know that your trinket is a 5V Logic version (not the 3.3V). This important when connecting your trinket to sensors, they have to be of the same voltage as your trinket.
Adafruit made a good tutorial on how to use this trinket.
- introduction: http://learn.adafruit.com/introducing-trinket/introduction
- tutorials: https://www.adafruit.com/products/1501#Learn
- adjusting Arduino IDE: http://learn.adafruit.com/introducing-trinket/setting-up-with-arduino-ide
0xchristmas workshop
So for making a Christmas tree/star with sound effects we made a guidance workshop where you are doing all the work and we are just helping.
For connecting everything together we need some jumper wires, there are a couple of ready-to-use cables available or you can make your own from some scrap electronics, especially solid core network cable works fine.
...more to come, still work in progress...
Components explained
trinket

source: [adafruit]
refer slides
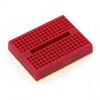
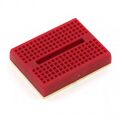
breadbord

source: [floris.cc]
image short explanation
cable

source: [farnell]
Just an ordinary cable nothing more to say. One side has a USB connection for your laptop and the other side has te be connected on your trinket.
Resistor
no image yet
Light Dependant Resistor

source: [farnell]
Light Emitting Diode

source: [farnell]
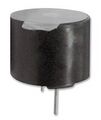
Piezo buzzer

source: [farnell
...more to come, still work in progress...
What should it look like
For the christmastree look here: Tinkercad - project: 0xchristmastree
Image of breadboard with LED,s and piezo connected.
code
the arduino code for this project:
      /*
  Blink
  Turns on an LED on for one second, then off for one second, repeatedly.

  This example code is in the public domain.

  To upload to your Gemma or Trinket:
  1) Select the proper board from the Tools->Board Menu
  2) Select USBtinyISP from the Tools->Programmer
  3) Plug in the Gemma/Trinket, make sure you see the green LED lit
  4) For windows, install the USBtiny drivers
  5) Press the button on the Gemma/Trinket - verify you see
     the red LED pulse. This means it is ready to receive data
  6) Click the upload button above within 10 seconds
*/

int led = 1; // blink 'digital' pin 1 - AKA the built in red LED

// the setup routine runs once when you press reset:
void setup() {
  // initialize the digital pin as an output.
  pinMode(led, OUTPUT);

}

// the loop routine runs over and over again forever:
void loop() {
    digitalWrite(led, HIGH);
    delay(1000);
    digitalWrite(led, LOW);
    delay(1000);
}


